Pod Direct Brands - Onboarding & Activation
Once you are approved by our team you will receive login credentials. Use these credentials to log in to our website as a Vendor. This is done via our login page and selecting I'm a Vendor
You are welcome to change your password once logged in
Go to the Settings tab in your Vendor Dashboard (this is the purple button that says [Dashboard] in the upper right hand corner of the screen) and select Payments to enter payout information via Stripe and credit card information. Payouts via Stripe allows us to pay brands. Payments (credit card or ACH) is for charging brands if they elect to use Shippo for Pod Direct shipments. For any questions please contact [email protected].
Once this is completed, you will be able to upload your Brand, Product Line, and SKU information as well as price your products
For information on your General Settings, please go to this section of the Help Center.
Once you have logged in and set up your payments you are ready to create your Brand in the Dashboard.
Go to the Brand Tab in the Dashboard toolbar, and then select + New Brand in the upper right corner
From here you will be able to create your Brand - Filling out the name, description, and state of origin.
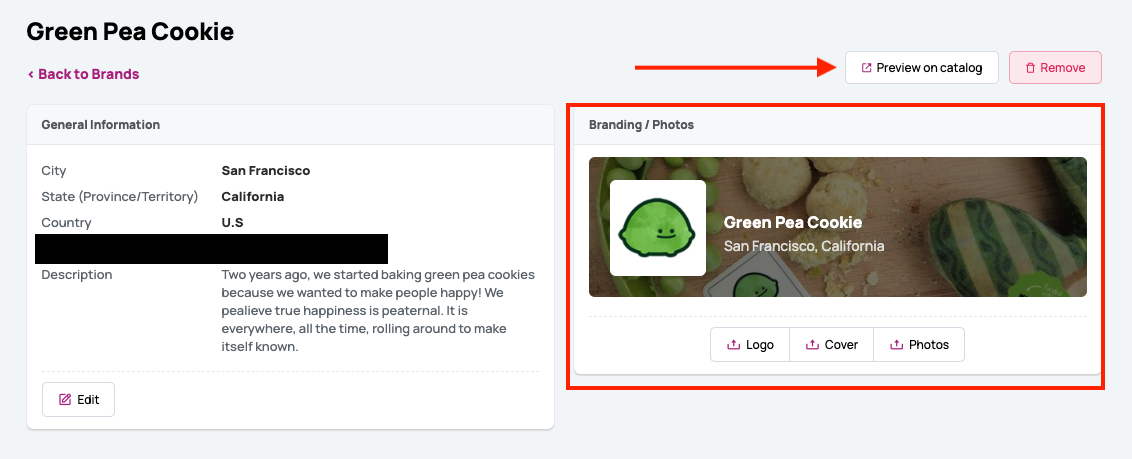
When clicking into the newly created brand, you can add your logo, cover photo, and additional product photos on your brand page.
After your SKUs are published feel free to preview your brand page on our catalog by selecting Brands in our search bar and entering your Brand name.
NOTE:
Brands are unique companies within the Dashboard
Products are unique product lines within the Brand
SKUs are unique flavors of the Product
It's time to create your unique product lines after your Brand is set up.
Note: You must create at least one SKU to the product line for the item to save. Products will not save without at least one SKU attached.
In the Dashboard, Product Lines are created as unique SKU-groups of uniform packaging. This means that the casepack, size, weight, and dimensions are static for a Product Line. Once created, you will be able to add SKUs to the Product Line. The SKUs are the unique flavors of the Product Line.
A good example is having a line of cookies. A Product Line would be created that is called Cookies where sellable units and casepacks are all the same size and weight. Within the Product Line is a SKU of each flavor: Chocolate Chip, Oatmeal, and Snickerdoodle.
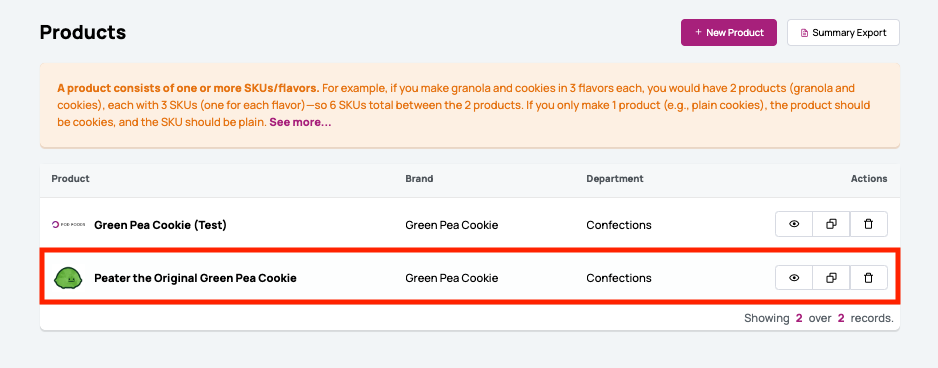
When setting up a Product Line, go to the Product tab in the Vendor Dashboard. From here, select the + New Product button in the upper right corner.
From here you will be able to input Product information, create your first SKU, and set pricing and availability for the SKU.
The first thing to do is set the Product Title - This is the name of the product line. In our example, we are using cookies. So the title would be Cookies. We would then want to associate the Product to the correct Brand, select the appropriate category (i.e. Confections). From here you may be prompted to input a Product Type - This is a subcategory that allows for more specific purchasing within the larger category. In our example using Confections, we have the option to select chocolate, confections, or cookies. We would select cookies.
Lastly, we highly recommend allowing stores to request samples of your product.
Pod Direct Brands are required to ship products in casepacks and not master cases. Listing master cases contributes to retailer confusion on our catalog and is reserved for Pod Express only.
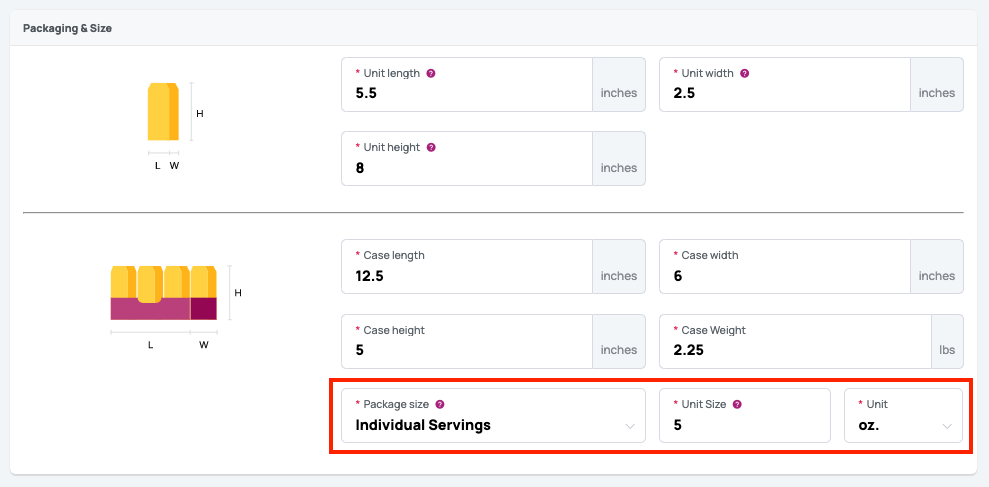
The next section allows you to input unit size, casepack size, and master case and/or pallet sizes. Master cases and pallet dimensions are required if you are part of the Pod Express program. Pod Direct Brands generally input only unit (eaches) and casepack dimensions as they are shipping directly to the retailer.
Unit Measurements - Input this information as LxWxH in inches of a single sellable unit
Casepack Measurements - Input this information as LWxH in inches of a casepack. You also must include casepack weight in pounds.
The last three fields are sometimes confusing within the casepack section
Package Size: This is based on how the item can be sold. Generally the options you will select are individual servings or multiple servings. Individual servings means the casepack is filled with products which are standalone at shelf, like jars of sauce. Multiple servings means the casepack can be sold as a whole, or broken into individually sold products. Examples of this are bird feeders for smaller grab-n-go items, sleeves of chocolate bars, or a 4-pack of non-alcoholic beers.
Unit Size: This is the net weight or volume of the unique unit (eaches). An example of this is 2.1oz for a single chocolate bar.
Unit: This is a unit of measurement for the unit size.
After your product dimensions are set up you will want to set your minimum order quantities. This means the minimum number of cases of the product that you require a retailer to purchase. This is important for you to reach market as well as set a clear minimum to ensure a margin is realized.
You are able to create your first SKU once the Product Line is completed.
Go to the Product Page and select the Product Line to which the SKU (flavor/variant) belongs
Once within the Product Line click Manage SKU
From here you can create a new SKU or manage existing SKUs
The first SKU is defaulted as the Main SKU - this means it will be the primary SKU shown when a Buyer/Retailer selects the Product. We recommend using your most well known or strongest selling SKU in the Product Line.
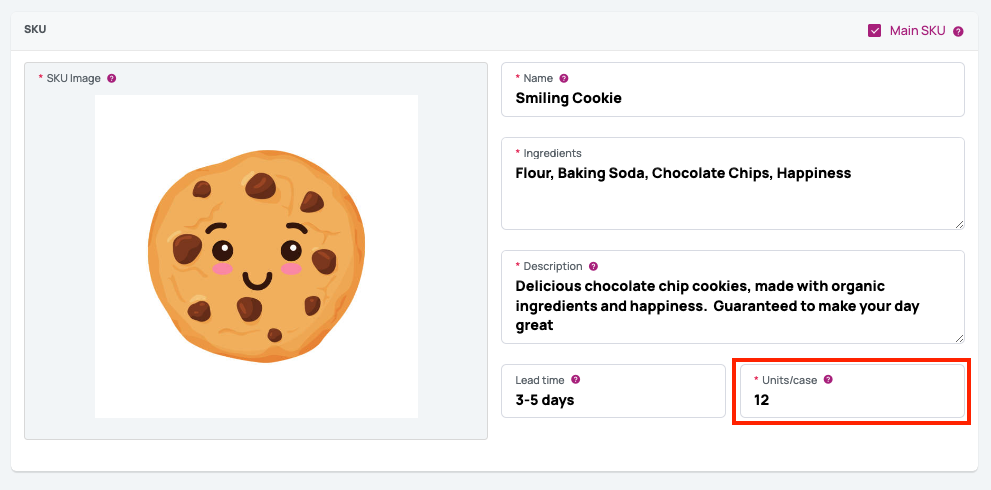
You will also be prompted to include a list of ingredients, a brief description, and the lead time for shipping. Lastly, and of high importance is the number of units per casepack. This is very important because the units/casepack impacts the price per unit on our catalog. If you are selling an individual serving, as indicated in the previous section, the units/case would be one (1). If you are selling multiple servings this could be something like 12 units per case.
Next you will upload images of your unit and casepack UPCs and input the numbers into the appropriate field. Double check your numbers before submitting this section, as incorrect UPCs may be rejected by stores upon delivery.
Now we need to indicate the Brand location - this helps Buyers know if your Products are local. You will also indicate what qualities/attributes your SKUs have. For example, this can be USDA Organic, Fair Trade, B-Corp. Be sure to upload corresponding certifications within the Settings-> General->Documents section of your dashboard after publishing your products.
After this, input the storage and retail shelf life of your SKUs, as well as the storage conditions. Once completed you just need to upload the nutritional labels.
To upload the nutrition label, select the small icon to the left of the description field. Then select your nutrition label and it will upload and be saved. You have an option of adding a description to the label, though it isn't necessary.
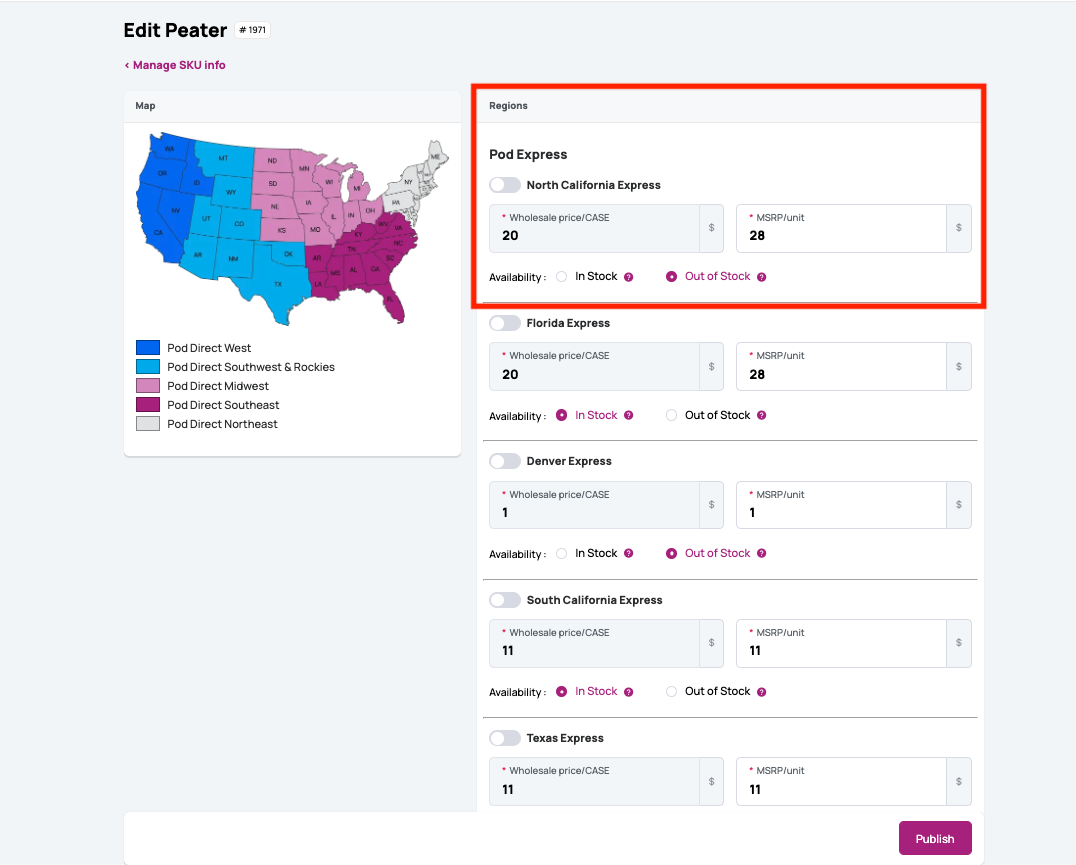
You're now ready to set up active regions and pricing! All onboarding brands should select the Pod Direct Regions and not the Express Regions unless you have inventory being shipped to a warehouse. Activation takes place within the [Manage SKU] section of the Product Line, where you can activate specific regions for specific SKUs.
At this point you will need to confirm basic expectations for Pod Direct:
Activate all regions for Pod Direct. When you activate the Pod Direct West region you will be prompted to verify whether any ingredients in your SKUs are on the California Proposition 65 List. Please review our Prop65 policy. Once this is verified, you will be able to activate the PDW region.
Now we can input wholesale prices and MSRPs per unit. We recommend using our wholesale pricing calculator to achieve this with a margin that is agreeable to your business - when setting pricing, please remember to incorporate margins for possible promotions.
Since the Pod Direct Brand is responsible for shipping costs (either via your select service or a Shippo label which you can print from your Dashboard) it is important to take these costs into account when setting wholesale pricing.
Remember: This relates to the units/casepack section when setting up the SKU. If there are 12 units/case, then the price per unit as it appears on our website will be [Wholesale Case Price / 12].
We recommend reaching a nationwide case price alignment based on the highest possible shipping cost and desired margin, and applying it across all regions. So, if your product is shipped from New York to Oregon or New York to Pennsylvania, the wholesale price should be universal and based on the highest shipping cost. This will allow your company to hit your margins for long distance shipping, as well as have higher profits for nearer deliveries.
Once your pricing and MSRP is set up in all regions, mark your products as [in stock] and click publish. When you do so, please email [email protected] and let us know you have published with the subject line [Brand Name - Published]. We will then review your products and provide best practices to sell on our marketplace.
To request product and/or pricing changes:
Click into the Product Line that you wish to change. This is done by clicking into the Product Tool, then selecting the specific Product Line.
At this point - If you want to enact casepack changes you can do so under the Packaging & Size section of the Product Line. Once input, please select [SAVE]
In the upper right corner of the page it says Manage SKU. This does not mean a single, unique SKU, but the SKUs that are tied to the Product Line. Click the Manage SKU button.
You will then see all published SKUs. At the bottom of the page is a button called Request Product Change. Click this button.
From here there are two options: 1) Product Information. This selection allows updates to be made to the unit dimensions. When updates are made, please click [SAVE]
If you want to make adjustments to pricing or UPCs, select the specific SKU under the Product Information section. This will generate those fields.
When adjustments are made, please click [SAVE]
We reserve 90 days to make changes for APL Brands to allow ample time for inventory adjustments, warehousing, and retailer notice as it relates to pricing updates.
Brands not carried on an APL can expect these adjustments to be made within a week of submission. You can update your MSRP/unit at any time by adjusting the field and republishing the SKUs.
If you have any questions please reach out to your category manager or to [email protected]
To make adjustments to in-stock or out-of-stock items, follow these steps:
Go to the Product Tool and select the specific Product Line you need to access
Select [Manage SKU] within the active SKUs section
Select the published SKU you wish to edit
Select Manage SKU Price
From here you can adjust the In-Stock, Out-of-Stock, and MSRP. Remember to click [PUBLISH] when done.


